 Photos by James River Media
Get On Board for an Exhilarating and Extreme Watersport
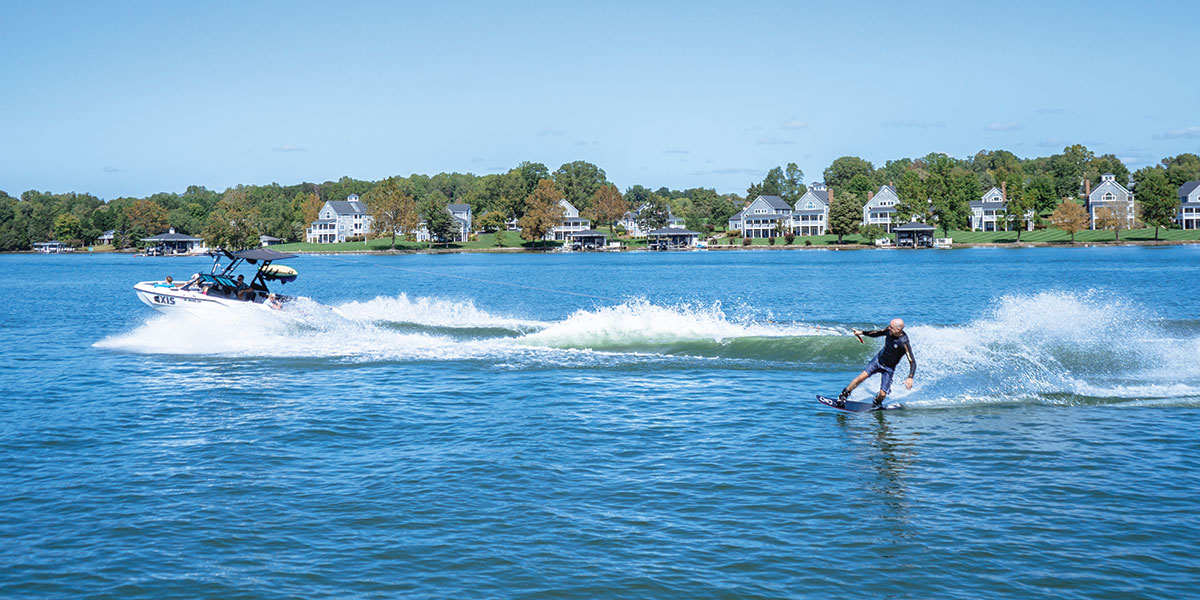
Waking up at the lake is the picture of serenity. Sipping on a morning brew while watching the sunrise is a gentle way to ease from sleepiness to wide awake. Water sports are an entirely different way to wake up the senses and feel fully alive at the lake.
The “wake” refers to the chaos created in the water by a boat traveling at a high speed. Wakeboarding is the synchronized movement of the body and balancing on the board, as the board glides afloat the wake. All this may look effortless to the landbound observer, but make no mistake: wakeboarding is one extreme watersport.
Who does wakeboarding appeal to?
Skiers, snowboarders, surfers and skateboarders might find the sport particularly enjoyable. Even if you have no prior experience or conditioning through similar sports, though, don’t be discouraged. A few tips and tricks just may give you the confidence to get your mind, body and soul on board. Pun intended!
 How to learn
Like any other sport, the best way to learn is by doing. The muscle memory is developed through repetitive motion once your body learns the sequences of movement and balancing techniques. You can build your confidence through YouTube tutorials, how-to articles and guidebooks. Once you’ve intellectually wrapped your head around the procedure, it’s time to hit the waves. Lessons can easily run you between $100-$200 per hour. If you have a trusted loved one who wakeboards, they might be willing to help you out for free, just for the fun of it. It’s your choice on how technical you want to get with the learning process. The strict adherence to steps, along with proper equipment, will help you go far in your preparation. Safety is paramount.
The length of your chosen wakeboard will depend on your weight and height. You can discuss these factors with a shop professional, whether renting or buying. The boat rope should be completely firm with no slack. Beginners should stick close to the boat with no more distance than 55 feet. The shorter the rope, the greater the pull and stability. More experienced wakeboarders may hang back as far as 75+ feet. Next, you’ll secure your feet in the boots, which might bring back nostalgic memories of learning roller skating. See? It’s not the first time you’ve kept yourself upright while moving through the world with speed and coordination. You’ve got this!
Once secured, your feet should be shoulder width apart. Point your toes slightly. Take hold of the rope with both hands, straighten your arms and bend your knees. Make sure that your body and board are aligned while facing the back of the boat. When the boat starts propelling and you feel that upward pull, bend your knees toward your chest. You should be vertical. If you’re tugged too far forward, bend your knees even more while squatting. Once balanced, you can straighten your knees to a standing position. Circle your dominant leg to the back.
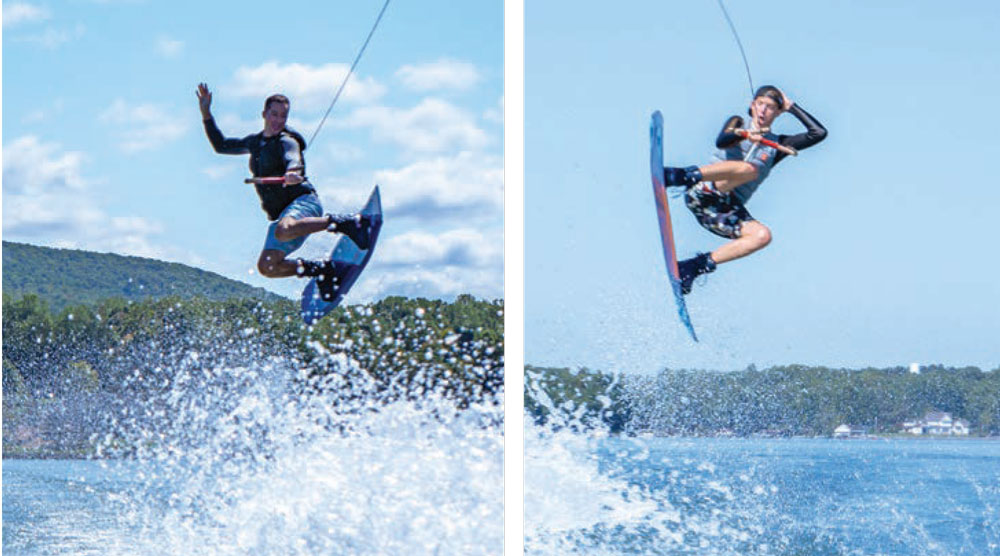
You will now be in the traditional sideways wakeboarding position. Once you get some practice and reach a comfort level with wakeboarding, you might even choose to try some ollie pops, edges, crosses, tail grabs, spins and jumps if you dare.
As earthbound humans, there’s just something about soaring above the water with a speed that our bodies don’t normally permit. Take to the wake and awaken your senses with pure adrenaline!
How to wakeboard: a guide for beginners
STEP 1: Choose the right size wakeboard.
When picking a board, your height, weight and skill level should be taken into consideration.
WAKEBOARD SIZING
| RIDER WEIGHT (LBS) | WAKEBOARD LENGTH (CM) |
|---|---|
| Less than 100 | Less than 130 |
| 90-150 | 130-134 |
| 130-180 | 135-139 |
| 170-250 | 140-144 |
| 200-275+ | More than 144 |
STEP 2: Tie the rope to the boat.
Quality wakeboard ropes have virtually no stretch. The length of ropes can vary from 55 to 75+ feet depending on experience level, boat wake and personal preference. It is better for beginners to tie the rope to the boat as short as you can. A shorter rope increases the amount of upward pull from the boat and places the wakeboarder at a narrower section of the wake.
STEP 3: Get ready.
Strap on the boots, ensuring your feet are shoulder-width apart and slighty turned out. This will give you stability when gliding on the water. Make your way into the water.
STEP 4: Get set.
To start, grab the rope, and get lined up with the boat. Keep your arms straight and your knees bent toward your chest.
STEP 5: Go!
Once the boat starts moving, it’ll pull you up. Keep the handle still and your legs bent, pulling your knees into your chest. If your hands are being pulled too far forward, that’s a sign your knees aren’t bent enough. Once you are over the top of your board and feeling balanced, you can straighten your legs, and slowly stand up.
STEP 6: Wakeboard.
Once you’re standing, gently rotate your dominant foot to the back. You’re now wakeboarding! Once you get the hang of it, try to move around, and cross the wake. As your skill level increases, you can try other tricks like spinning or jumping.
Source: wakesports.com, skatepro.com, evo.com
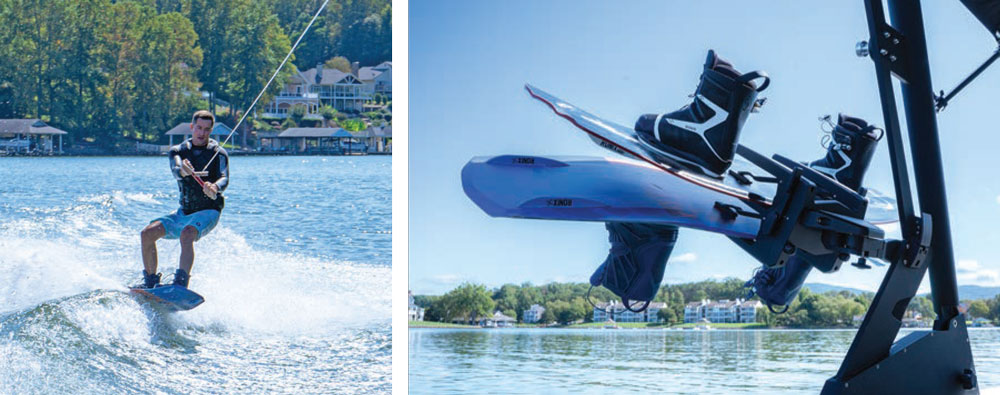
Now trending: Hydrofoiling
You may have noticed small crowds gathering on the lake shore to watch boarders with those funky vertical attachments that tower them far above the water. What are they doing? Hydrofoiling, or simply “foiling” as it’s known in the inner circles, looks similar to wakeboarding but is technically a different sport altogether.
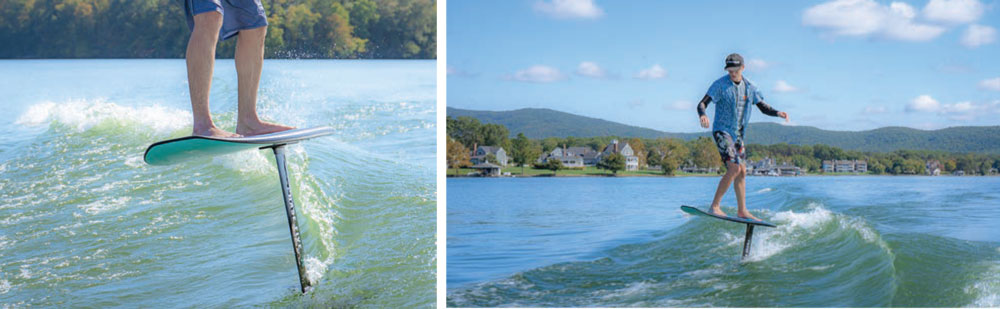
FUN FACTS:
- While both wakeboarding and foiling involve a board behind a boat, foiling involves a different board and extra gadgets.
- The long mechanical piece that sticks out of the water is called a fuselage, and its job is to connect the board to an underwater wing propeller feature.
- The hydrodynamic design allows the hydrofoil to transform the track of water molecules with a force that propels the board above the water.
- While traditional wakeboarding embraces the force of the wake, foiling avoids the brunt of it by gliding parallel to it.
- While wakeboarding relies on the rhythm of the wake, foiling involves a rhythmic popping motion performed by the foiler.
- Safety tip: If hydrofoiling, you should wear a helmet and an impact vest for rib protection. These help prevent injuries if the board slips. Since foilers don’t traditionally wear attached boots, staying upright is all about balance. ✦