
Charcuterie boards have seen a boom in popularity within the past couple of years. People are taking what was once found almost exclusively at catered events and preparing beautiful boards right in their own homes. Not only do they provide an attractive way to serve snacks, but they are also versatile: charcuterie boards have come to include much more than the traditional meat and cheese. It may seem intimidating to put together a whole board on a first attempt, but there are some guidelines that will make it easy.
 There are a lot of choices when finding the right board to display your food. You can use a classic wooden board, typically found in round, rectangle or paddle shapes. Another popular material is slate. The best thing about this type is that you can label each item by writing directly on the board with chalk. For a refined look, marble boards are a great option. They look chic but are also the easiest to clean. Boards are readily available locally in kitchen and gift stores or in box stores and online.
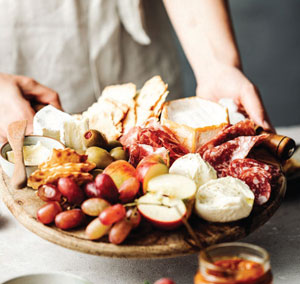
When selecting ingredients for your board, it’s important to include a variety of tastes and textures. Start with a hard, dry-cured meat, like sopressata, saucisson sec or Spanish chorizo. Next, choose something thinner with a fattier texture like prosciutto, coppa and Genoa salami. Finish off with something spreadable and silky, like liverwurst, spicy Italian pork ‘nduja, or a pâté. Having meats with varying flavor profiles adds dimension as well. You can add finocchiona salami for its fennel flavor, or Calabrese for spice. Having a mix of flavors and textures keeps things interesting, and may offer guests a taste of something new.
Your decision of what cheeses to buy should be made similarly. Grab a hard cheese like Parmesan, aged Gouda or Asiago. Move on to a firm cheese like Manchego, cheddar, or Gruyere. Round it out with soft cheese such as Brie, goat cheese or burrata. While all of those taste vastly different, you can mix it up even more by throwing in some funkier flavors like a smoked Gouda, Stilton blue cheese or Gorgonzola. While the stronger flavors can be a bit divisive, sometimes the risk is worth the reward.
Provide vessels to eat the meats and cheeses, like crackers or sliced baguette. Fruit pairs wonderfully as well, adding a sweet component to the savory charcuterie. Pick any combination of grapes, cherries, raspberries, blackberries, figs or pears. Use what is in season, too. Try cranberries in winter, apples in fall, or peaches in summer. Include pickled foods, like olives, pickled onions and gherkins. Finish everything off with a selection of spreads. Try different mustards, fruit spreads and honey to bring new life to the cheese on your board.
Now that you’ve gathered your ingredients, it’s time to arrange everything. Place the cheese evenly across the board, and put the knives next to each piece of cheese so that you remember to leave room for serving. Scatter the ramekins filled with spreads and olives similarly. When placing the meats, arrange them in a way that’s easy to grab. You can lay them flat in neat stacks if you have more room on your board, or roll them and place the rolls in a pile. You can even make sliced salami into a rose shape by folding pieces around the lip of a cup or cookie cutter. However you decide to display it, position the meats in the spaces between the cheese and ramekins. Fill in any gaps with crackers and crostini, fruits and nuts. If your board is tightly packed, placing the same ingredient in multiple spots around the board is a good idea. This allows for easier access for multiple guests and creates balance.
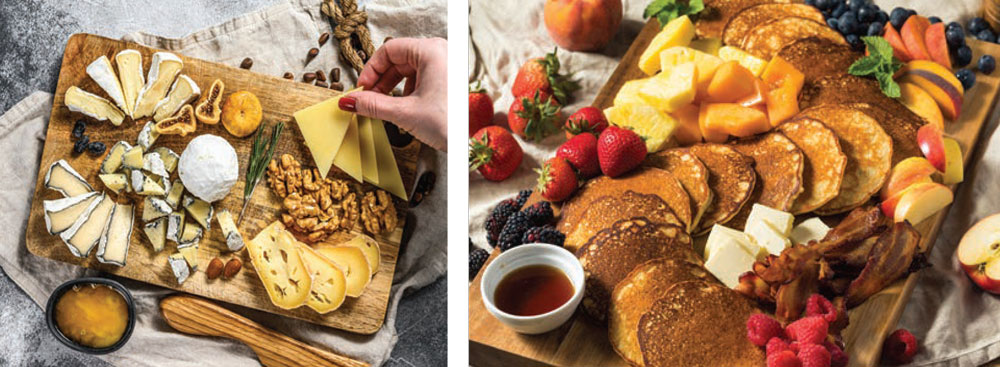
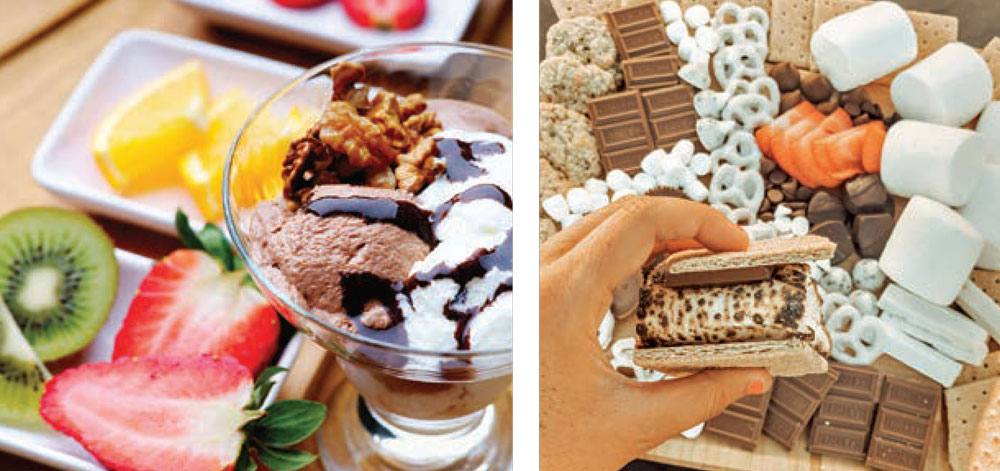
 We don’t have to limit ourselves to snack boards serving only meat and cheese, though. Take the presentation style and apply it to any occasion or craving. For a morning event or something creative for overnight guests, you could make a breakfast board. Substitute the ordinary cured meats with breakfast sausage, smoked salmon and bacon. Include pieces of bagels or biscuits instead of crackers, and add a few flavors of cream cheese instead of your typical cheese selections. You can fill a ramekin with scrambled eggs, or place soft-boiled eggs across the board. If you’re more of a sweets-for-breakfast kind of person, do a pancake and waffle board. Use the ramekins for syrup, butter and powdered sugar, and sprinkle chocolate chips and fruits around the board for toppings. For a birthday celebration, do a dessert board. Anchor the board with petit fours and cupcakes, and fill the spaces with different candies. Another take on the dessert board is creating an ice cream sundae board. Substitute a traditional platter with a shallow decorative tub or lined tray filled with ice. (You can even use a giant foil baking pan if you’re being casual.) Burrow several pints of ice cream in the tub, and line the perimeter with small cups of sprinkles, nuts, and chocolate and caramel sauce.
Charcuterie boards are the ultimate no-stress, versatile offering. If the grocery store doesn’t have the ingredient you’re looking for, simply substitute a similar flavor. Just use what is easily available to you. Remember that half the fun is in the presentation; a charcuterie board is simply a novel way to serve snacks. Don’t get hung up on perfection; just be excited for the time you can spend with those you love. ✦